Monday, September 2, 2013

Fall Fever & a DIY Magnolia Wreath

Happy Labor Day friends!
Tonight I am bringing you a tutorial on making a Fall wreath out of Magnolia Leaves!
 
So Fall isn't exactly here yet, but I have got the bug big time. I am already scheming about my fall décor for this year, and I probably shouldn't admit it, but I have already started to decorate. Shameful I know.... but I have no shame! I LOVE this time of the year, and I am SO over summertime. I am ready for pumpkin everything in full force.
 
This weekend I pulled out all of my faux pumpkins, apple cider candles, and leafy decorations. I have plans to do something to my faux pumpkins, but in the meantime they sit atop my mantle and give me a quick fall fix every time I walk into the room.
 
As I was decorating on Saturday and going through my fall hoard collection, I realized that I was missing something. This something is big and substantial and really gives a fall feeling to any space. This item that I was lacking was in fact a wreath.
Now I have an ever growing assortment of Christmas wreaths that I rotate according to mood. I truly believe that you can never have too many. My fiancé would highly disagree with me on that, but obviously he will never understand. I don't however own any fall wreaths of any sort. Crazy right?! How could this happen....? So to fix this very serious problem of mine, I decided to try my hand at making a wreath from scratch.
 
We have a magnolia tree in our backyard that has been shedding leaves all summer. The dogs love to lay under the tree to escape the hot summer heat, and I love the crunching sound it makes when they run around under it. The leaves range in color from green to brown and every shade in between. Honey colored, golden colored, and even some gorgeous marbled green and browns. I picked a bunch of them out of my yard and set to work.
 
I wanted to accomplish this task by spending zero money on the project. Yes, I could have bought a nice plain wreath to decorate, but I didn't really see the point. The large magnolia leaves would have covered it up anyway.... so instead I pulled out an old shoebox.
 
Yes. A Shoebox. Essentially a piece of cardboard. ( I keep shoebox lids on hand for projects such as this) So glad I finally found a use for one of them.
 
You could really use any piece of cardboard or heavy cardstock that you have laying around. Using what you have is always cost effective. Cost effective is the way to go.
 
 Funny thing is the shoebox was from a pair of boots I bought last fall... which made me even more excited for this fall. Boots, Sweaters, and Scarves = Happiness!
 
 
TUTORIAL
 
Supplies
Cardboard
Exacto Knife
Hot Glue
Leaves
Ribbon (optional)
 
Cost
$0
 
 
Start by cutting your cardboard into a circle. Or a Rectangle or square if you prefer. Don't worry about it being perfect. It wont show. You just need to be sure you have a solid surface on which to hot glue your leaves.


 Then, one by one glue your first layer of leaves down covering up the outside perimeter of your cardboard. Working in layers is better for overall aesthetic, but again however you want it to look is up to you.


 I rotated green and brown to give it a more balanced look.
 
Once you get the first layer down, work a second and third layer in and around the wreath like so.


Make sure to cover up any empty spots.
Go back in and place one leaf at a time until you get the finished look you are going for.
Seriously not rocket science guys! Anyone can do this.
 
 
This is my close to finished project. I still think it needs something though. A white floral embellishment or ribbon bow of some sort. Play around with it until it suits your taste.
I kind of like the simple organic and rustic feel of it though.


Here she is hanging on the outside of my office door next to our mantle!
Please excuse my overexposed photos. I am still learning how to properly use my DSLR!
 
Voila!


And here's a sneak peak of my Fall mantle scape!
 
More coming on that soon!
 
 
Have a great week everyone! Hope you enjoyed this tutorial!
Happy Blogging!


Tuesday, August 27, 2013

Schools back for the fall

Hello friends!
Sorry it has been a few days since I last posted. I hope you enjoyed my post on the DIY outdoor chandelier.

School started yesterday so it has taken me some time to adjust to my new schedule. Did I mention I am still in school? At the age of 23, I never guessed that I would still be saying that.
I am just starting my 6th (and final) year at Georgia State University, and though it has taken me a long time to finish... it wasn't my choice.
I have had my ups and downs with the financial aid department at my university, and I have had to take a year and a half off due to payment reasons...regrettably! Gasp! But I guess when it's not up to you, what choice do you have?

That's my situation however....


School starting means great things though. Not only is the vibe much more energetic and happy around these times, but it only means one thing......

FALL!

Fall is the best time for crafting and recipes...
College Football
School
Halloween
The list goes on...

Stick by me and I will be sure not to disappoint. I have a whole list of things I plan on getting done. I will be sure to blog about them so that I can inspire you guys to get creative this fall too!

See you in a couple days!


Friday, August 23, 2013

Summertime Craftness

Happy Friday everyone!

 Another week has gone by and it means that we are inching closer and closer to Fall. This is bittersweet for me because I love summertime so much! The hot weather, vacation to the beach, margaritas, and family BBQs. There are so many great things about summer!
Then comes fall. The leaves start falling, pumpkin everything (I do not like a lot of pumpkin food stuff, I will admit) College football, and chilly weather.

Both seasons are fantastic as far as I'm concerned.
What is sometimes hard, is just the transition into another. I do love change however, and I'm always ready for something new.

Today I want to showcase a project that I did early in the summer, and pay homage to all those times we grilled out with friends, lit up the fire pit in our backyard, and truly enjoyed the summer weather on those nights.


Best thing of all......this project cost me absolutely nothing!

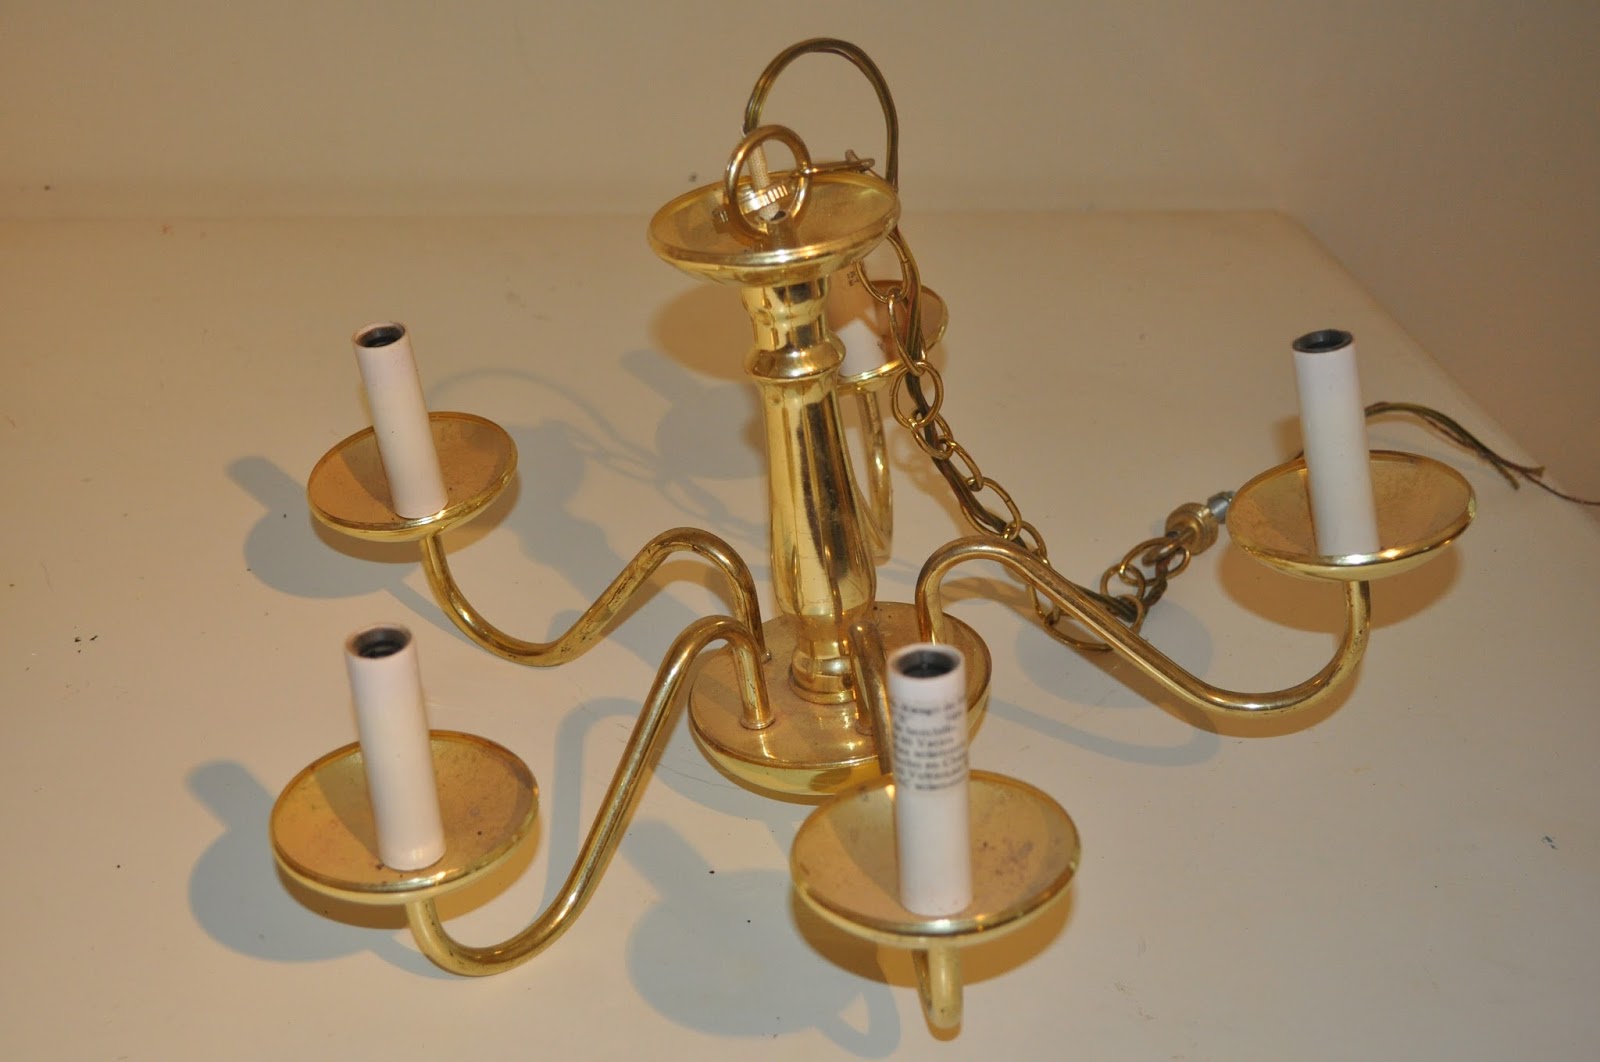
When we moved into our house, there was an old brass builder grade chandelier laying around. You know the ones....
 
Anywho, I wanted to do something with it, but I knew that I did not want to put it back up inside our house. We already have hanging light fixtures and too many plenty of various table lamps and floor lamps. So I went with the idea of an outdoor chandelier! It would be perfect for our back patio space!
 
 
I started by cleaning it well to remove any debris, dust, and dirt.
 
Then I had to remove the candle tubes, and wiring underneath. I simply popped the tubes off, and cut the wires down as far as I could.


I gave the candle trays one last wipe down under where the tubes used to be, and prepped the chandelier for painting.
I hung the chandelier outside in my backyard from a tree, so that I could spray paint it effortlessly and have the chance to spin it around to coat it completely. I used one of my very favorite spray paints called 'Heirloom White' by Rustoleum. If you are any sort of crafty, home, DIY blogger you know the magic of the HW. Its always the perfect white for bringing any old piece forward into modern times.

 
I gave my chandy 3 coats, letting it dry in between. I then finished with a clear coat just to seal it from the elements.  
 
THAT, my friends is the extent of it. This is seriously easy stuff right here guys! Don't ever pass by an old chandelier! You. Can. DOOOOO. it.
 
One more time for the hell of it. The Before and After.
 
Just add some pilar candles that match your outdoor décor, and you are good to go my friends!


Enjoy!
Get Crafty Peeps!


Tuesday, August 20, 2013

Chalk it up

For those of you that know me, you know that I spend a pretty good bit of my free time thrifting. I stop by regularly to browse through other people's old junk, but I only visit particular areas of each store. I spend most of my time in the household items, rarely stepping foot into the clothing aisles. I'm not sure, but something about racks of  old stained bras and underwear hanging next to my head freaks me out. I have to seek refuge amongst the vases and old lamps.

One of the more successful thrifting trips I have gone on recently, took place just a few miles down from my house at the local Value Village. I like this VV because the pickings are never slim in terms of the household items I go searching for. Frames, Candle Holders, Glassware a plenty!

This VV sits on the cusp of a very bad neighborhood. There are a lot of drugs, violence, and an overwhelming amount of poverty. There are not a lot of savvy thrifters like myself hunting for DIY treasures on the regular, and therefore there is always a bounty. As much as I do not like to profit from other's misfortune, in this case I just consider myself to be rescuing these items from despair.
Most of the people who live around this VV are not concerned with what kind of frames they can find to paint, and which wreaths they can restore and reuse. They are only concerned with how they can afford to feed their families and make it to the next paycheck.

My favorite pick of the trip by far, was the god awful frame that I picked up for $1.00.
Here she is. Poor thing.
Before
 
Whoever owned this completely botched the paint job. There is absolutely no way that someone intended for it to look this way.
If they did, I feel sorry for them.
No wonder it ended up on the thrift store shelves.
The frame itself was spray painted silver and black in a camo-esque fashion, but I spotted it from afar as I frolicked down the aisles, and I could tell is was in good condition. The shape was what really caught my eye, and I knew in an instant that it was bound to come home with me and be mine.
 
I had been wanting a chalkboard in my kitchen for a while, and had been wanting to try out a DIY chalk paint recipe simultaneously. This piece seemed like the perfect candidate for me to try it on.
Unfortunately, I was not thinking and did not take any pictures during the process. Just believe me when I tell you how easy it was.
 
Before I give you my recipe for success and a quick tutorial on the process itself, here she is after!


After
Ahhh! So much better.
I used this tutorial from Elsie & Emma over at A Beautiful Mess
 
First, I painted the frame with Rustoleum's Heirloom White. (my favorite) I wanted the frame to be a little bit weathered and shabby so I sanded the edges to let some of that black and silver shine through. I simply used a block sander in a fine grit.
 
Then I made my chalk paint using black acrylic craft paint and black unsanded grout powder. I knew that I wanted the traditional black chalk board, so I chose the black grout on purpose.
 
Picture courtesy of Lowes.com
 
The paint itself was chunky and bubbly, and I thought to myself..... just keep stirring. It smoothed out just fine, and I painted right over the existing floral picture canvas. Bye Bye 1970.
 
You want to make sure you let it dry overnight. Don't be impatient. And before you write on it you have to "season" it like a cast iron skillet.
 
I could slap myself for not taking pictures of all of these details, because you're probably wondering what the hell I am talking about when I tell you to season a chalkboard. But trust me it's important.
 
For tips on seasoning and decorative chalk writing, check this out, by Diane at In My Own Style.
 
 
I hope you enjoyed reading about my kitchen chalkboard that went from boo to ooooh!
I love it so much, and I have used it more ways than one.
 
Thanks for reading!
 

A sure fine place to start...

Before I start throwing every project I ever did at your face.....Here's a little about me! Somewhat organized in a fun and kind of lame info graphic! Yay!


Monday, August 19, 2013

New kids on the blog!

So I did it. I finally did it.

 I have gone over and over in my head for months, even years about starting a blog devoted to my creative interests. I have started so many in the past, but nothing ever seems to come of them. I think it has always been the pressure of creating a blog specifically for one thing, and the notion that I would run out of things to write about, as well as the pressure to complete projects and write every other day. While I do have a list of ongoing projects 24/7, I never seem to have enough time to do them all.... much less write about them.

This, however will be different. I can focus on lifestyle blogging versus only crafts and recipes. It will give me more options to post about, and keep it interesting..... because let's be honest.
My life is pretty interesting.

My interests themselves span an entire array of areas. Cooking, Baking, Crafting, Designing, Photography, Family, The Holidays.  The list goes on and on.... Here I can post on topics related to all of those, and more. Hopefully my readers will find them as interesting as I do.
I'm so excited for this blog-journey!

Until next time