Friday, August 23, 2013

Summertime Craftness

Happy Friday everyone!

 Another week has gone by and it means that we are inching closer and closer to Fall. This is bittersweet for me because I love summertime so much! The hot weather, vacation to the beach, margaritas, and family BBQs. There are so many great things about summer!
Then comes fall. The leaves start falling, pumpkin everything (I do not like a lot of pumpkin food stuff, I will admit) College football, and chilly weather.

Both seasons are fantastic as far as I'm concerned.
What is sometimes hard, is just the transition into another. I do love change however, and I'm always ready for something new.

Today I want to showcase a project that I did early in the summer, and pay homage to all those times we grilled out with friends, lit up the fire pit in our backyard, and truly enjoyed the summer weather on those nights.


Best thing of all......this project cost me absolutely nothing!

When we moved into our house, there was an old brass builder grade chandelier laying around. You know the ones....
 
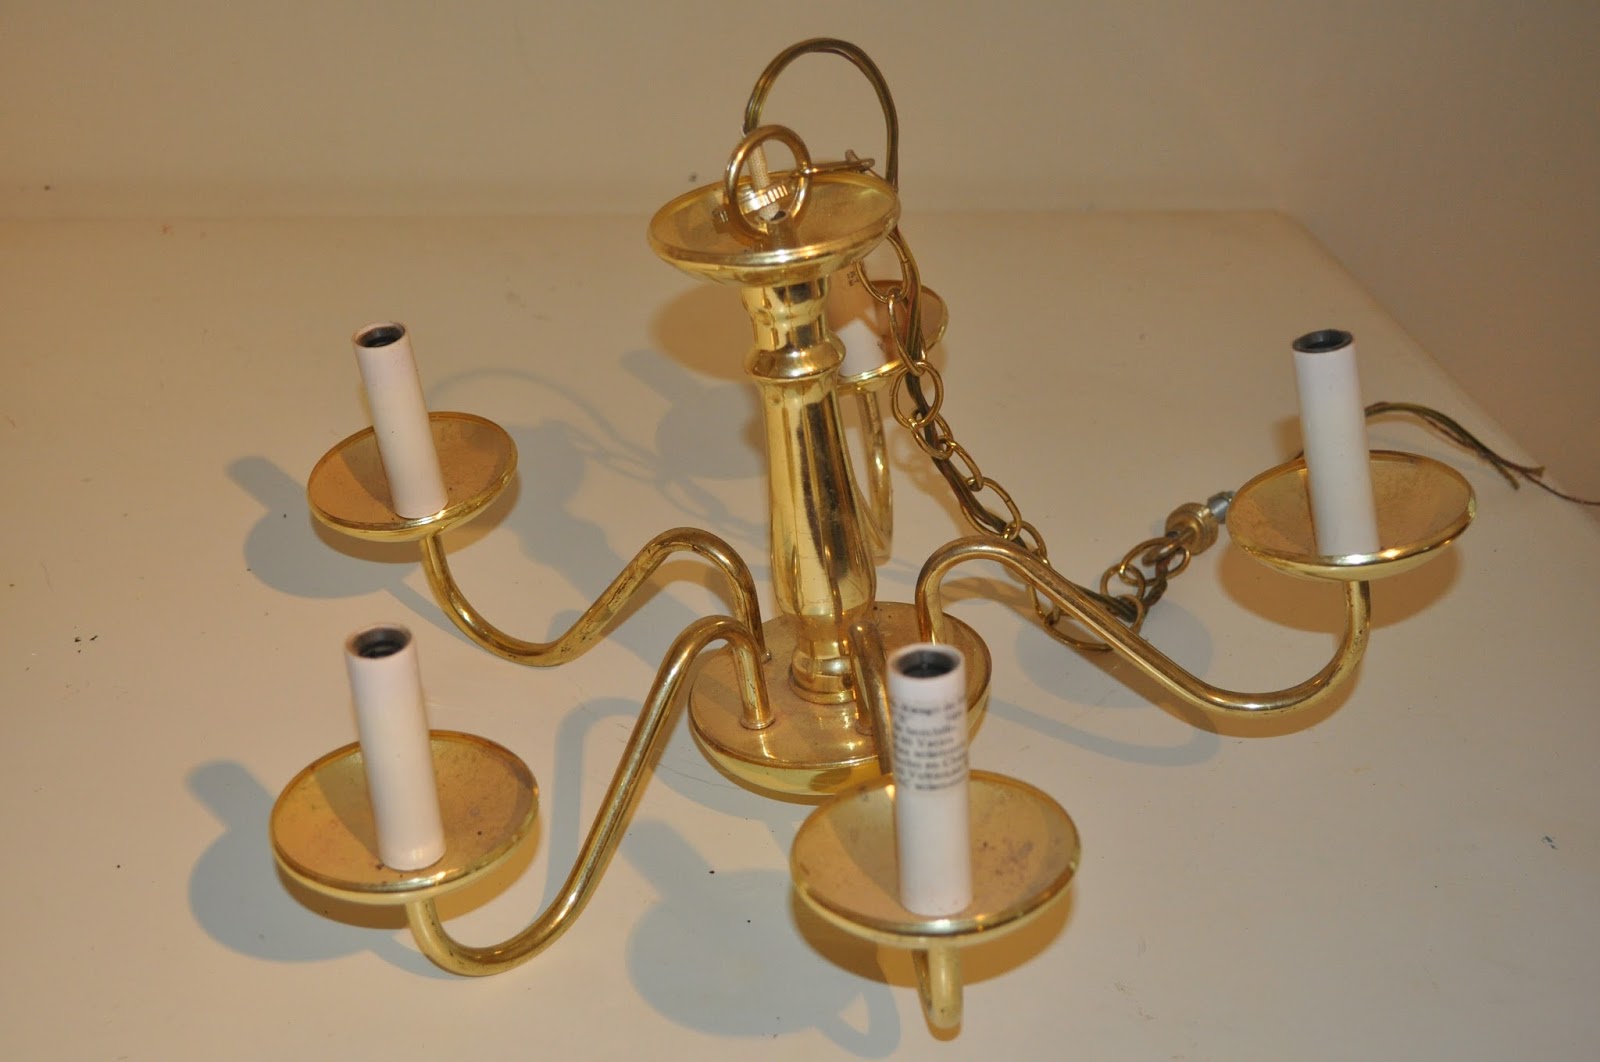
Anywho, I wanted to do something with it, but I knew that I did not want to put it back up inside our house. We already have hanging light fixtures and too many plenty of various table lamps and floor lamps. So I went with the idea of an outdoor chandelier! It would be perfect for our back patio space!
 
 
I started by cleaning it well to remove any debris, dust, and dirt.
 
Then I had to remove the candle tubes, and wiring underneath. I simply popped the tubes off, and cut the wires down as far as I could.


I gave the candle trays one last wipe down under where the tubes used to be, and prepped the chandelier for painting.
I hung the chandelier outside in my backyard from a tree, so that I could spray paint it effortlessly and have the chance to spin it around to coat it completely. I used one of my very favorite spray paints called 'Heirloom White' by Rustoleum. If you are any sort of crafty, home, DIY blogger you know the magic of the HW. Its always the perfect white for bringing any old piece forward into modern times.

 
I gave my chandy 3 coats, letting it dry in between. I then finished with a clear coat just to seal it from the elements.  
 
THAT, my friends is the extent of it. This is seriously easy stuff right here guys! Don't ever pass by an old chandelier! You. Can. DOOOOO. it.
 
One more time for the hell of it. The Before and After.
 
Just add some pilar candles that match your outdoor décor, and you are good to go my friends!


Enjoy!
Get Crafty Peeps!


Tuesday, August 20, 2013

Chalk it up

For those of you that know me, you know that I spend a pretty good bit of my free time thrifting. I stop by regularly to browse through other people's old junk, but I only visit particular areas of each store. I spend most of my time in the household items, rarely stepping foot into the clothing aisles. I'm not sure, but something about racks of  old stained bras and underwear hanging next to my head freaks me out. I have to seek refuge amongst the vases and old lamps.

One of the more successful thrifting trips I have gone on recently, took place just a few miles down from my house at the local Value Village. I like this VV because the pickings are never slim in terms of the household items I go searching for. Frames, Candle Holders, Glassware a plenty!

This VV sits on the cusp of a very bad neighborhood. There are a lot of drugs, violence, and an overwhelming amount of poverty. There are not a lot of savvy thrifters like myself hunting for DIY treasures on the regular, and therefore there is always a bounty. As much as I do not like to profit from other's misfortune, in this case I just consider myself to be rescuing these items from despair.
Most of the people who live around this VV are not concerned with what kind of frames they can find to paint, and which wreaths they can restore and reuse. They are only concerned with how they can afford to feed their families and make it to the next paycheck.

My favorite pick of the trip by far, was the god awful frame that I picked up for $1.00.
Here she is. Poor thing.
Before
 
Whoever owned this completely botched the paint job. There is absolutely no way that someone intended for it to look this way.
If they did, I feel sorry for them.
No wonder it ended up on the thrift store shelves.
The frame itself was spray painted silver and black in a camo-esque fashion, but I spotted it from afar as I frolicked down the aisles, and I could tell is was in good condition. The shape was what really caught my eye, and I knew in an instant that it was bound to come home with me and be mine.
 
I had been wanting a chalkboard in my kitchen for a while, and had been wanting to try out a DIY chalk paint recipe simultaneously. This piece seemed like the perfect candidate for me to try it on.
Unfortunately, I was not thinking and did not take any pictures during the process. Just believe me when I tell you how easy it was.
 
Before I give you my recipe for success and a quick tutorial on the process itself, here she is after!


After
Ahhh! So much better.
I used this tutorial from Elsie & Emma over at A Beautiful Mess
 
First, I painted the frame with Rustoleum's Heirloom White. (my favorite) I wanted the frame to be a little bit weathered and shabby so I sanded the edges to let some of that black and silver shine through. I simply used a block sander in a fine grit.
 
Then I made my chalk paint using black acrylic craft paint and black unsanded grout powder. I knew that I wanted the traditional black chalk board, so I chose the black grout on purpose.
 
Picture courtesy of Lowes.com
 
The paint itself was chunky and bubbly, and I thought to myself..... just keep stirring. It smoothed out just fine, and I painted right over the existing floral picture canvas. Bye Bye 1970.
 
You want to make sure you let it dry overnight. Don't be impatient. And before you write on it you have to "season" it like a cast iron skillet.
 
I could slap myself for not taking pictures of all of these details, because you're probably wondering what the hell I am talking about when I tell you to season a chalkboard. But trust me it's important.
 
For tips on seasoning and decorative chalk writing, check this out, by Diane at In My Own Style.
 
 
I hope you enjoyed reading about my kitchen chalkboard that went from boo to ooooh!
I love it so much, and I have used it more ways than one.
 
Thanks for reading!
 

A sure fine place to start...

Before I start throwing every project I ever did at your face.....Here's a little about me! Somewhat organized in a fun and kind of lame info graphic! Yay!


Monday, August 19, 2013

New kids on the blog!

So I did it. I finally did it.

 I have gone over and over in my head for months, even years about starting a blog devoted to my creative interests. I have started so many in the past, but nothing ever seems to come of them. I think it has always been the pressure of creating a blog specifically for one thing, and the notion that I would run out of things to write about, as well as the pressure to complete projects and write every other day. While I do have a list of ongoing projects 24/7, I never seem to have enough time to do them all.... much less write about them.

This, however will be different. I can focus on lifestyle blogging versus only crafts and recipes. It will give me more options to post about, and keep it interesting..... because let's be honest.
My life is pretty interesting.

My interests themselves span an entire array of areas. Cooking, Baking, Crafting, Designing, Photography, Family, The Holidays.  The list goes on and on.... Here I can post on topics related to all of those, and more. Hopefully my readers will find them as interesting as I do.
I'm so excited for this blog-journey!

Until next time